Luma x21/x20 quick start (using OvrC)
Get your Luma system up and running in minutes—installs have never been easier!
Caution: Do not change the NVR's HTTP port away from port 80. Doing so hobbles OvrC's abilities.
- 1: Claim the Gear
- 2: Fetch the Cameras
- 3: Complete the Setup
- 4: Hand Off the System
1: Claim the gear
The Luma x21/x20 lines integrate seamlessly with OvrC.
Fire it up
Before you claim the NVR:
-
Attach the NVR to the network. Do not power it up yet.
-
Connect all cameras that are wired directly to NVR ports.
-
Power everything up (the NVR beeps when powered up, and beeps three times when it finishes booting).
Claim the NVR in OvrC
If you have an OvrC Pro device on the network (an OvrC Hub, Araknis router, or Control4 Controller), it automatically claims the NVR when it connects to the system.
If you do not have an OvrC pro device, claim the NVR manually using its MAC address and service tag number.
What happens when the NVR is claimed?
OvrC automatically activates the NVR and creates two unique sets of credentials, each with a randomly generated password:
-
SupportAdmin: Use this account's password to connect to the NVR’s web UI.
-
SystemConnect: Use this account's password for control system integration or for external systems like a third-party VMS. It does not provide access to the web interface.
These passwords match across all devices that OvrC Pro claims for the system. Since these passwords are generated automatically and randomly, the system is already secured, and you can immediately begin customization.
Technical Support can use the SupportAdmin password for emergency recovery. This password is not visible to anyone else.
2: Fetch the cameras
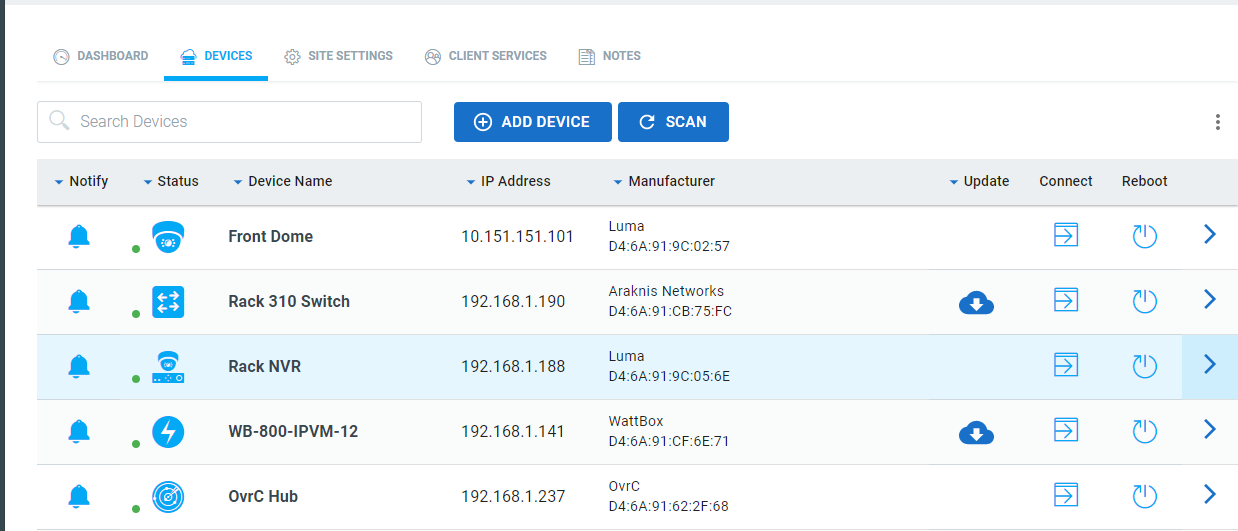
In OvrC, go to the Devices tab.
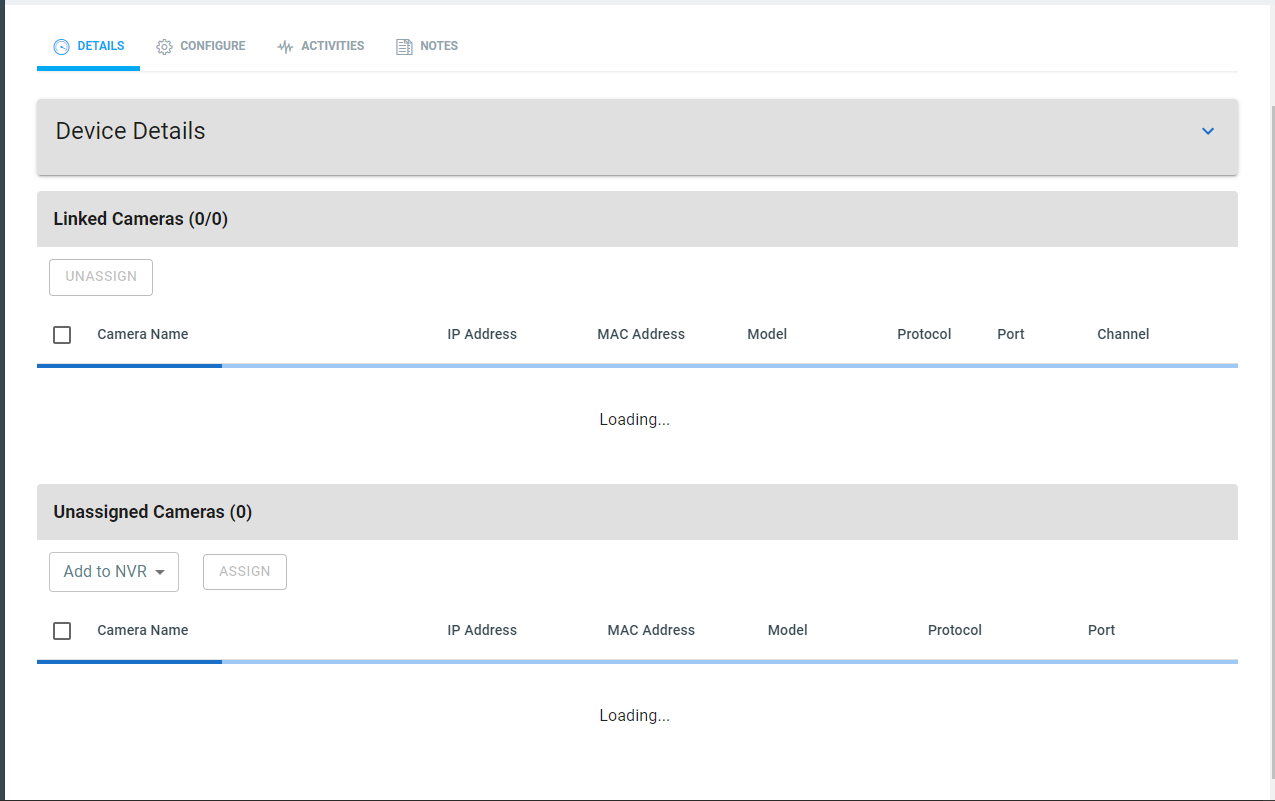
Click the NVR, then to go to the NVR’s Details tab.
You’ll see the message Loading… under the Linked Cameras and Unassigned Cameras sections as OvrC scans the network.
-
Linked cameras: This shows all x20 cameras that are directly connected to the NVR’s PoE ports. x10 cameras and third-party cameras using ONVIF also show, but with less information. OvrC activates all these cameras and sets them up with the same passwords that the NVR uses.
-
Unassigned cameras: This shows all cameras connected to the network that can connect to the NVR. Cameras here are either third-party cameras, older Luma cameras, or x20 cameras attached to a network switch.
Once OvrC has finished scanning, it populates camera data, including a dot to the left of each camera to show its status.
Missing cameras? If a camera is not showing up as expected, manually add it using the NVR's web interface. Luma x20 NVRs are ONVIF conformant.

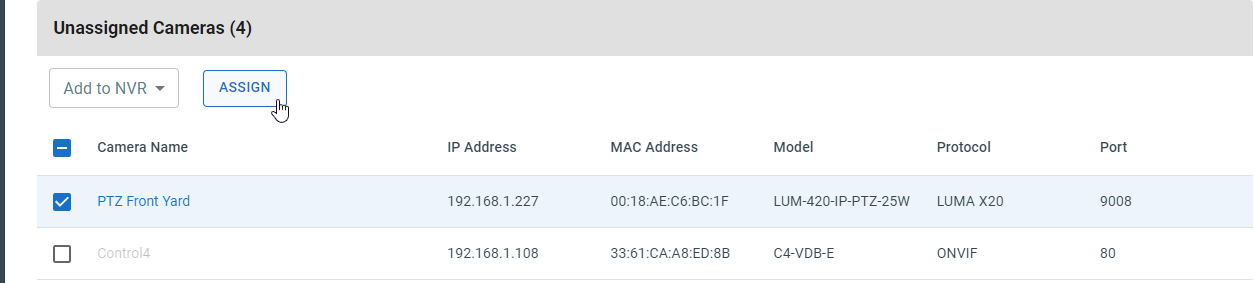
Adding unassigned cameras to the NVR
When adding cameras that have a password that matches the SupportAdmin password on the NVR, click the selection box next to the cameras, ensure "Add to NVR" shows in the dropdown, and click Assign. This moves the cameras up to the Linked Cameras section.
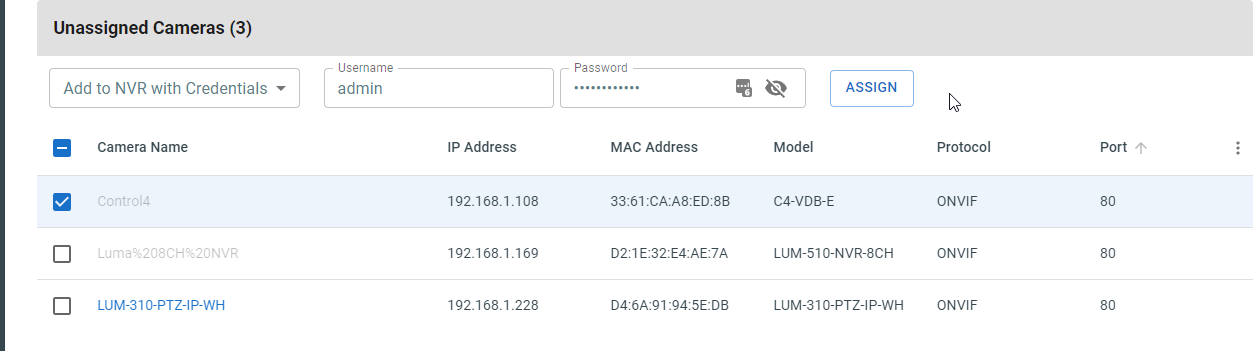
When adding a camera that does not share the NVR’s password, select the camera’s checkbox, and change the dropdown to "Add to NVR with Credentials". When prompted, type the username and password for that camera, then click Assign. OvrC processes the transaction, and, after about 10 seconds (time enough to communicate with the OvrC servers), the screen displays the change.
The dot next to an added camera may show red (offline) for a short while. If it still shows red after 30 seconds, refresh your screen. If it still shows red, you may need to do some troubleshooting.
Removing a camera
You can unassign a network camera listed in the Linked Camera section. Click the camera’s checkbox and click Unassign at the top of the list. It takes a few seconds for OvrC to update the screen with the change. You cannot unassign a camera that is plugged into the NVR itself; you can only remove network cameras.

3: Complete the setup
Once the NVR is activated and the cameras claimed, your system is fully operational. By default, the NVR is set to record all cameras around the clock.
Perform maintenance
If the NVR or cameras have a cloud icon under the Update column, click that icon to start a firmware update. Update the NVR’s firmware first and ensure the device is back online before initiating camera updates.
Choose a recording schedule
You do not need to change the recording schedule unless the install has very specific needs.
Activate motion events
The NVR is already prepared to record whatever the cameras send, including motion and AI events (area intrusion, e.g.), however you must set those cameras to use events, rather than record 24/7 (which consumes a lot of disk space). For this quick-start, we’ll just set up motion events.
From the NVR's Details tab, click on the camera's name. Alternatively, click the camera in the OvrC Device list. Either way, you are taken to the camera's Details tab. Click on the eye icon in the area labeled Activity Zones. Check that the entire camera view is covered with a green grid.
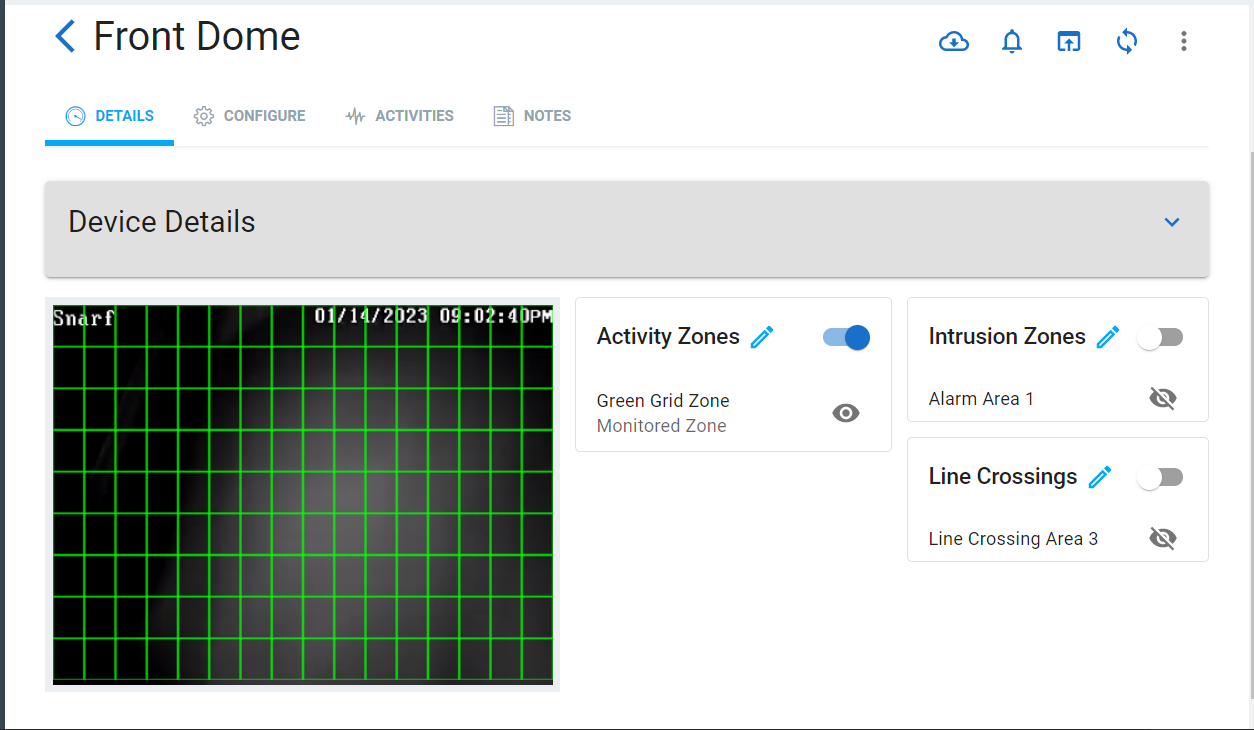
At the top right of that box, flip the toggle to enabled. Motion detection is now activated, and the camera switches from recording everything 24/7, to recording motion events 24/7.
Visit How Do I...? for information on setting up other features.
4: Hand the system off to the customer
Once you have finished system customization, it's time to hand the system over to the customer. The hand-off process gives the customer access to the Luma View app on their mobile devices (as well as features for other apps).
In the Customer page, go to the Settings tab. It opens into the Manage Access section.
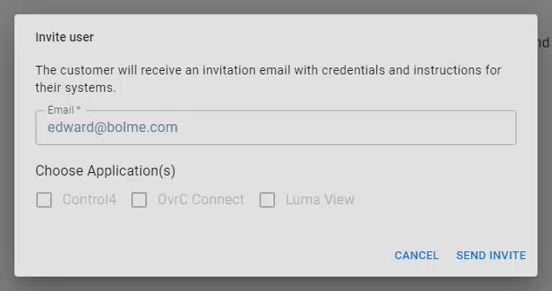
Click + Invite User.
![]()
The dialog loads with the customer's email (if possible, otherwise you need to enter it).
Click all the apps they need for their install. Click Send Invite.
The customer then appears on the Manage Access page with the status "Validating."
What does the customer see?
OvrC sends an email to the customer welcoming them to OvrC Connect and Luma View. This email gives them instructions as well as a six-digit code that serves as their temporary password. Once they log in to OvrC Connect and change their password, they'll be able to download Luma View and connect to that, as well.
Video decoupling
Video decoupling provides your customers with privacy and protects you from legal exposure, while still allowing you to perform maintenance on your customers' systems.
24 hours after handoff, you (as an installer) lose access to live video from the customers' cameras. You can request access for a limited time for maintenance or upgrades, but the default state is to protect the customer's privacy.